What Lighting Setup Suits a Town Hall Livestream?
Last Updated: November 17, 2026
Quick Summary
Good town hall lighting starts with three-point lighting: a key light about 45 degrees to one side of the camera and slightly above eye line, a dimmer fill light on the opposite side, and a subtle backlight behind the speaker. Match every light to one colour temperature and lock white balance and exposure manually before the stream.
- Daylight sits around 5600K and tungsten hall lighting near 3200K, so gel lights to match the room.
- Test for flicker with a 30-second clip at your planned shutter speed before doors open.
- For a seated panel, measure the table width and add about 1 metre at each end.
- Keep audience light at least one stop below the panel so reaction shots are not black.
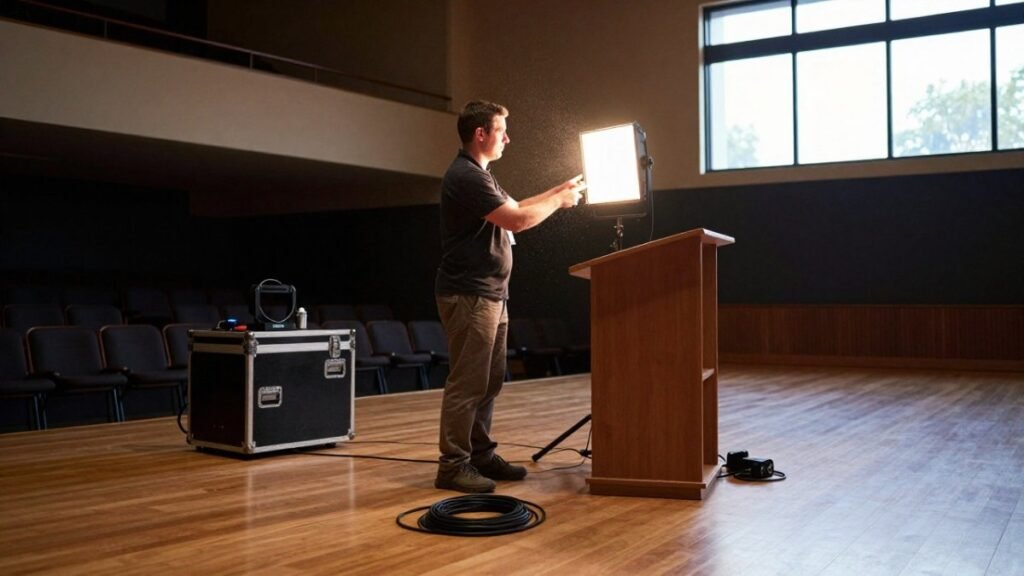
- Where stands are banned, battery LED panels on tables at about 45 degrees are the practical answer.
Table of Contents
- Why Town Hall Lighting Decides Your Stream Quality
- Building a Live Streaming Lighting Setup That Works in a Venue
- How to Fix Uneven Lighting for Video in a Town Hall
- Lighting for Panels, Multiple Speakers and the Audience
- Camera Exposure and Colour Consistency Across Shots
- Low-Budget and No-Rigging Lighting Options
- Your Live Streaming Equipment Checklist Before Doors Open
- Book a Lighting and Streaming Walkthrough Before Your Next Town Hall
- Frequently Asked Questions
Why Town Hall Lighting Decides Your Stream Quality
Bad lighting sinks a town hall stream faster than a weak internet connection. Viewers forgive a small audio glitch.
Here is the core problem. Venue lighting is built for people in the room, not for a camera lens. Overhead downlights carve dark shadows under brows and noses.
The fix does not require expensive gear. It is correct placement, controlled colour temperature, and a camera that is set up properly.
Building a Live Streaming Lighting Setup That Works in a Venue
A reliable live streaming lighting setup starts with three lights and one rule: the camera decides, not the room. Build your plan around the camera’s position first, then place lights to serve that angle. Once the camera angle is set, matching the lights to the room’s layout helps keep faces clear without distracting from the meeting, just as choosing live streaming equipment suited to a small congregation begins with the space and the people in it.
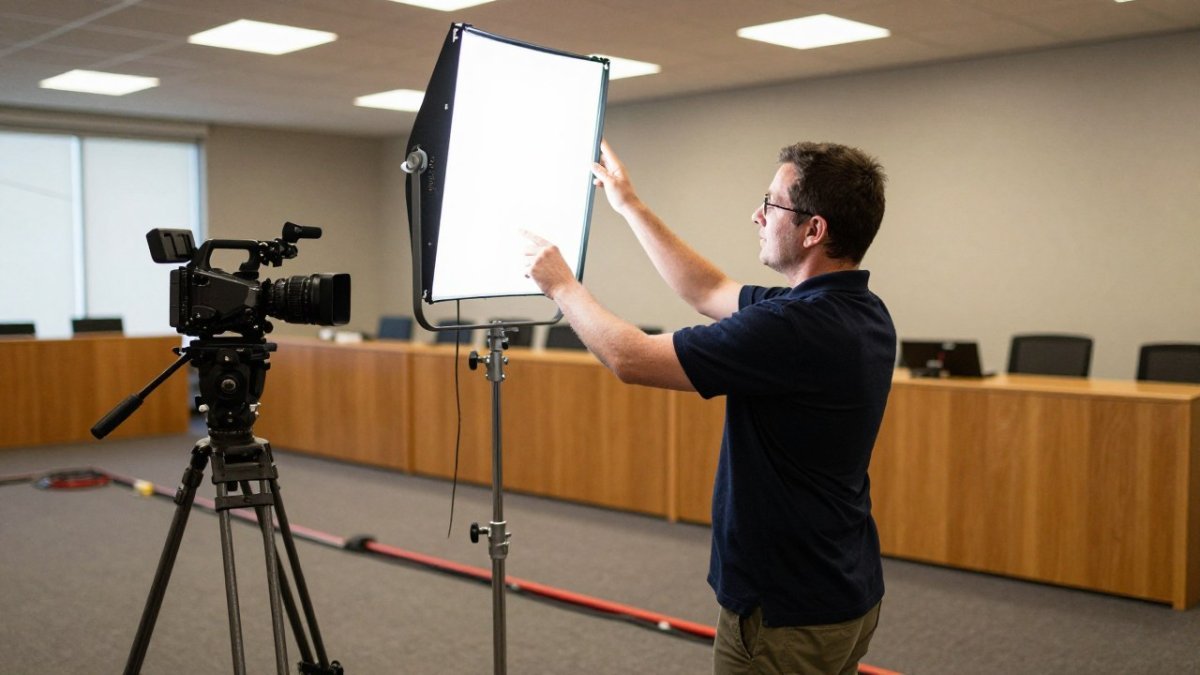
Key Light, Fill Light and Backlight Placement
Key light is the main source.
Fill light softens the shadows the key light creates. Place it on the opposite side, lower and dimmer than the key.
Backlight separates the speaker from the background. Put it behind and above the subject, angled down.
Three-point lighting is the baseline. In a small room, one soft key light plus a bounce card often beats three harsh lamps.
Colour Temperature and White Balance
Colour temperature is measured in Kelvin. Daylight sits around 5600K. Tungsten hall lighting sits near 3200K. Mixing the two without correction gives you an orange speaker on a blue background.
Match every light to one temperature, then set white balance on the camera to match. If venue lights cannot change, gel your LED lights to match the room instead. Check skin tones on a monitor, not the camera screen.
How to Fix Uneven Lighting for Video in a Town Hall
Learning how to fix uneven lighting for video comes down to three moves: identify the source of the imbalance, control it, and re-check on camera. Most town halls have hot spots near windows and dark pockets near side walls.
Mixed Lighting, Flicker and Glare
Mixed lighting is the most common culprit. Daylight from a window plus tungsten downlights creates two colour casts on one face.
Flicker shows up as rolling bands. It comes from cheap LED and fluorescent fixtures running on mains power.
Glare hits glasses, whiteboards and polished lecterns. Move lights off-axis and tilt them down. A polarising filter helps on glossy surfaces.
Lighting for Panels, Multiple Speakers and the Audience
Panels break single-speaker lighting plans. One key light cannot cover four people spread across a stage. The practical answer is a broad, even wash across the whole panel, plus a soft backlight per seat.
For deeper guidance on coordinating several speakers and their technical setup, see our guide to managing multi-speaker live stream events.
Sizing the wash for a seated panel
Measure the full width of the panel table first, then add about 1 metre at each end so the outer seats are not lit from the edge.
Set both panels to the same output and the same colour temperature. If one panel is closer to the table, dim it rather than moving it, so the falloff across the row stays even.
Keeping speakers evenly exposed as they move
Standing panels and speakers who step away from the table need more coverage than a seated row. Adding a third soft source on the opposite side or raising the panels can help the light reach standing head height.
Lock exposure to the brightest face in the row, not the average.
Watch out: if speakers turn to address each other, the side of the face away from the key light can fall into shadow.
Audience and reaction shots
Light the audience softly so reaction shots are not black, but keep the audience level at least one stop below the panel. A single dimmable panel aimed at the front two rows, or the venue’s existing house lights brought up to about 30 per cent, is usually enough. Avoid lighting the audience so brightly that the panel looks dim by comparison.
A quick panel checklist
- Measure the table width and add 1 metre at each end
- Two overlapping soft panels about 3 metres in front, 2.5 metres apart, angled inward
- One soft backlight per two seats, 1.5 metres behind and 2 metres up
- Match colour temperature across every fixture
- Lock exposure to the brightest face, not the average
- Keep audience light at least one stop below the panel
Camera Exposure and Colour Consistency Across Shots
Exposure consistency matters more than perfect exposure. A slightly dark shot held steady looks better than one that drifts bright and dim as the camera moves.
Lock exposure and white balance manually before the stream. Auto settings hunt for a target and cause visible shifts when a speaker in a white shirt walks in.
Set one reference frame at the lectern, then match every other camera to it. For the broader process of keeping quality steady across devices, our guide on ensuring HD quality live streams walks through the full workflow.
Low-Budget and No-Rigging Lighting Options
Not every venue allows stands, clamps or cable runs. Some heritage rooms, council chambers and shared spaces restrict rigging. You can still light well, but the plan has to work within the venue’s rules rather than around them.
Work out the constraints before you choose gear
Ask the venue manager three questions before you pack anything: what can be fixed to walls or ceilings, where the power points are and what load they carry, and which exits and access paths must stay clear. A room that bans rigging usually still allows freestanding tripods within your own footprint, and most venues will permit battery fixtures on tables if cables are taped and kept out of walkways.
Power is the quiet constraint. Venue power circuits have limited continuous load once the house system is running, so check fixture ratings before committing. Check the rating on each fixture and add them up before you commit; a pair of small LED panels draws far less than older tungsten lamps and is easier to place on a shared circuit.
Options that work without rigging
Ring lights work for a single seated speaker and pack flat. They suit a lectern shot but fall off quickly across a panel, so treat them as a one-person tool.
LED panels on small tripods suit tight spaces and can be moved between events.
Battery LED panels placed on tables are the practical answer where stands are banned.
Bounce cards made from foam board lift shadows for almost nothing.
Use the room’s own light
If fixtures are not allowed at all, reposition the speaker so existing window light falls on the face rather than behind it. A speaker turned 90 degrees to a window gets soft side light for free.
Watch out: a window that is fine at 10am can flood the stage at 2pm. Check the sun path for the event time, not the time you set up, and have a plan to close blinds or move the speaker if the light shifts.
Safety and accessibility
Keep every stand and cable out of fire exits and accessible routes. Tape cables across walkways or route them along walls. Angle lights so they do not shine into the audience’s eyes or reflect off glasses and polished lecterns. If the venue has a heritage listing, confirm in writing what can be placed on floors and tables before the day.
Our guide to professional streaming equipment for business covers budget-friendly picks in more detail.
Your Live Streaming Equipment Checklist Before Doors Open
A live streaming equipment checklist prevents the scramble that ruins a stream in the first five minutes. Run it every time, even for small events.
| Check | What to Confirm | When |
|---|---|---|
| Lights powered and positioned | Key, fill and backlight on and aimed | 90 minutes before |
| Colour temperature matched | All lights and camera at one Kelvin value | 60 minutes before |
| White balance locked | Manual setting, tested on skin tone | 45 minutes before |
| Exposure locked | No auto mode, checked at lectern | 45 minutes before |
| Flicker test | 30-second clip, no rolling bands | 30 minutes before |
| Glare check | Glasses, lecterns and screens clear | 20 minutes before |
| Audio split confirmed | Feed from PA tested to stream | 20 minutes before |
| Backup plan ready | Spare light and cable on hand | 10 minutes before |
When
Book a Lighting and Streaming Walkthrough Before Your Next Town Hall
Lighting plans fail when they meet a real room. A walkthrough catches the problems a checklist cannot: the window that floods the stage at 2pm, the flickering fixture near the lectern, the power point that is not where the plan assumed.
Webcasting Livestream uses fail-safe procedures designed to keep streams from failing, and records events so the footage can be provided to you. If you are weighing whether premium lighting and HD are worth it for executive events, read our breakdown of HD streaming for executive presentations first.
A town hall stream only gets one chance. If the lighting is wrong on the day, the recording carries that flaw into every replay.
Frequently Asked Questions
Can you livestream a town hall using the venue’s existing lights?
Often you can, but the result depends on what those lights are doing. Fluorescent tubes and older dimmable LEDs can flicker on camera at certain shutter speeds, and ceiling fixtures tend to light the top of a speaker’s head rather than their face. Test the room on camera before event day, set your camera to match the room’s colour temperature, and add one soft key light at 45 degrees to the speaker if faces look flat or shadowed. If the existing lights flicker, switch to LED panels you control.
Where should lights be placed for a live video stream?
Start with a three-point arrangement. Put the key light about 45 degrees to one side of the speaker and slightly above eye level, roughly 1.5 to 2 metres away for a soft LED panel. Place the fill light on the opposite side at a lower intensity to soften shadows, and a backlight behind and above the speaker to separate them from the background. Keep lights out of the camera frame and away from glossy surfaces that bounce glare back at the lens.
What colour temperature is best for a town hall livestream?
Match your lights to the room rather than picking a favourite number. Daylight-balanced LEDs at around 5600K suit rooms with large windows, while many venues run warmer fixtures near 3200K. If you cannot change the house lights, set your added LED panels to the same Kelvin value and lock white balance manually instead of leaving it on auto. A consistent colour temperature across speakers and camera angles stops skin tones shifting mid-meeting.
How do you stop shadows and glare on camera during a council meeting?
Shadows come from hard, single-source light, so soften the key with a diffuser and bring in a fill light from the opposite side. Glare usually comes from light hitting a glossy lectern, a window behind the speaker or a whiteboard, so reposition lights away from reflective surfaces and flag them with black cloth if needed. Avoid placing a speaker directly in front of a bright window, and check the shot on a monitor rather than the camera’s small screen.