
Table of Contents
- Planning Your Professional Webcast Recording and Archiving Strategy
- Selecting Webcast Recording Equipment for Professional Quality
- Preparing Speakers and Presentation Materials
- Webinar Recording Storage and Video Archiving Best Practices
- Recording, Encoding, and Post-Production Workflow
- Enabling On-Demand Webcast Access and Content Reuse
- Archive Governance, Retention, and Compliance
- Frequently Asked Questions
Last Updated: October 9, 2026
Planning Your Professional Webcast Recording and Archiving Strategy
Professional webcast recording and archiving isn’t an afterthought. It’s the foundation of content that keeps working long after your event ends.
Define your recording objectives and audience needs
Ask what you need from your recordings: compliance documentation, a training library, or marketing assets? Each goal changes how you record, store, and manage content.
Audience matters too: internal training needs different quality than external product launches, and remote participants have varying bandwidth. Plan resolution and bitrate around who’s watching.
Document these needs before you touch any equipment:
- Primary use case (training, compliance, marketing, archiving)
- Target audience size and location
- Playback devices (mobile, desktop, smart TV)
Assess your technical infrastructure and bandwidth
Your connection might handle live streaming but struggle with simultaneous recording and backup. Professional webcast recording and archiving demands more from your network than streaming alone.
A 1080p HD stream uses roughly 2.5-5 Mbps upload; adding a local recording backup doubles that, and cloud backup during the event pushes you to 7.5-15 Mbps sustained.
Check storage capacity too: a 2-hour HD webcast generates 15-25 GB, so archiving multiple events monthly makes storage planning critical.
Selecting Webcast Recording Equipment for Professional Quality
Quality equipment doesn’t mean expensive. It means the right tool for your specific setup.
Microphones and audio capture
Audio is where most webcasts fail. Poor sound makes viewers quit faster than poor video.
A USB condenser microphone on a desk arm works for single speakers; the Audio-Technica AT2020USB+ is reliable.
Position your microphone 15-20 cm from the speaker’s mouth, closer picks up breath noise, farther captures room echo.
Cameras and video capture devices
Camera choice depends on whether you’re recording one presenter or a full room.
For one or two speakers at a desk:
- A standard webcam (1080p, 30fps) is adequate if lighting is good
- A DSLR or mirrorless camera on a tripod gives you more control and better image quality
- Connect via HDMI to your recording software for cleaner capture than USB
For larger events or multiple camera angles:
- Use a dedicated video camera or camcorder
- Position one camera on the presenter, another on the audience or slides
- Switch between feeds during editing, or record all angles simultaneously and edit later
Frame your shot before going live: leave space above the speaker’s head, avoid extreme angles, and centre the presenter.
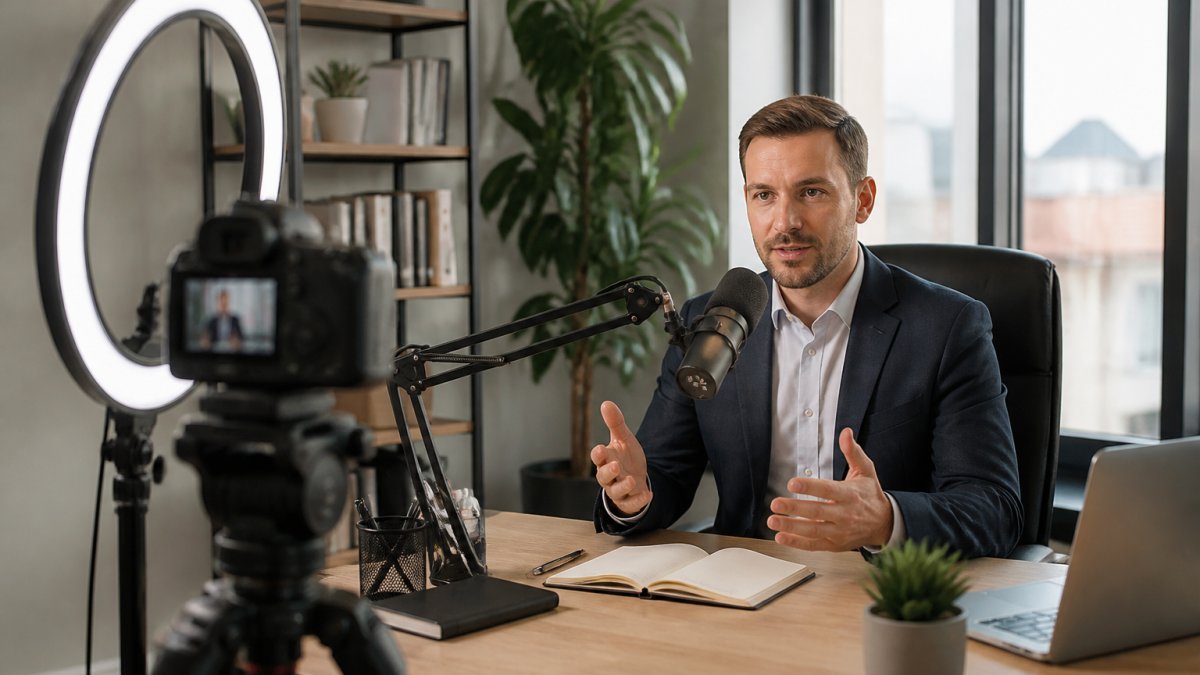
Lighting and screen sharing setup
Harsh overhead lighting creates shadows and washes out skin; ring lights or softbox lights at 45 degrees produce flattering, even light.
If sharing your screen, test before going live: confirm text is readable, colours display correctly, and animations play smoothly.
For screen-only presentations, ensure slides have sufficient contrast, light text on dark backgrounds works better on demand.
Preparing Speakers and Presentation Materials
Your speakers are the most important part of your webcast. Poor preparation shows immediately.
Speaker briefing and technical rehearsal
Brief your speakers at least one week before the event. Provide a written guide covering:
- How to join the platform and test their connection
- Microphone and camera positioning
- What to expect during the webcast (timing, transitions, Q&A format)
Schedule a full technical rehearsal at least 48 hours before the live event, running the entire presentation with all speakers, slides, video clips, and screen sharing to catch problems that only appear under real conditions.
During rehearsal, check:
- Audio levels for each speaker (no clipping, no background noise)
- Video quality and framing for each camera angle
- Screen sharing resolution and readability
Record this rehearsal. Review it with your speakers. Most people are surprised how they actually sound and look on camera.
Quality control checks before going live
Work through a checklist 30 minutes before your webcast starts.
Equipment checks:
- All microphones working and levels set
- All cameras focused and framed correctly
- All lights on and positioned
Content checks:
- All slides present in correct order
- All videos and audio clips embedded and playing
- All speaker names and titles correct on slides
Participant checks:
- All speakers can hear and see the moderator
- Audience members can see and hear the presentation
- Chat or Q&A feature working (if enabled)
Webinar Recording Storage and Video Archiving Best Practices
Where you store recordings determines whether they stay accessible or disappear into forgotten folders.
Choosing cloud and local storage solutions
Most professional webcast recording and archiving strategies use both local and cloud storage.
Local storage (external hard drive, NAS):
- Fast access for editing and quality checks
- No monthly fees
- Risk of hardware failure
Cloud storage (AWS S3, Google Cloud, Azure, Dropbox):
- Accessible from anywhere
- Built-in redundancy (multiple copies across data centres)
- Monthly costs scale with storage size
For most organisations, the best approach is:
- Record locally during the webcast
- Verify the recording is complete and playable
- Upload to cloud storage within 24 hours
- Keep the local copy for 30 days (in case you need to re-encode)
- Delete the local copy after cloud backup is confirmed
This balances speed, cost, and safety.
Archive formats, metadata, and file organisation
Name files consistently with the event name, date, and speaker name:
2026-10-15_ProductLaunch_SarahSmith.mp4
Create a metadata file alongside each recording with:
- Event title and date
- Speaker names and titles
- Duration
Store metadata as a simple text file or spreadsheet, searchable and portable.
Organise your archive by year and event type:
Archive/
2026/
Product_Launches/
2026-10-15_ProductLaunch_SarahSmith.mp4
2026-10-15_ProductLaunch_SarahSmith_metadata.txt
Training/
2026-09-20_SafetyTraining_TeamA.mp4
2026-09-20_SafetyTraining_TeamA_metadata.txt
Backup, redundancy, and disaster recovery
One backup is not enough. Professional webcast recording and archiving requires multiple independent copies.
Your backup strategy should include:
- Primary storage (cloud service like AWS or Google Cloud)
- Secondary backup (different cloud provider or on-site NAS)
- Offline archive (external hard drive stored off-site, updated quarterly)
Test recovery annually: restore a recording from each backup location and verify it plays, catching problems before an emergency.
Document your backup schedule and retention policy. Who backs up? When? How often? How long do you keep copies?
Recording, Encoding, and Post-Production Workflow
The moment your webcast ends, your workflow begins.
Live capture and encoding during the webcast
Your recording software captures video and audio in real time. Professional tools like OBS Studio or Wirecast let you:
- Record multiple video sources (cameras, screen share) simultaneously
- Mix audio from different microphones
- Apply basic colour correction and scaling
Set encoding bitrate based on your audience’s typical connection. For on-demand viewing where people can pause and buffer:
- 1080p: 4-6 Mbps
- 720p: 2.5-4 Mbps
- 480p: 1-1.5 Mbps
Higher bitrate means larger files and longer uploads. Lower bitrate means faster delivery but reduced quality. For professional webcast recording and archiving, capture at the highest quality your storage can handle. You can always create lower-bitrate versions later for mobile or slow connections.
Editing and post-production tasks
Most webcast recordings benefit from light editing:
- Trim the beginning (before speakers start talking)
- Trim the end (after the closing remarks)
- Add title cards with speaker names and topics
Use Adobe Premiere, DaVinci Resolve, or CapCut; for simple cuts and audio adjustments, free tools like Shotcut work well.
Edit in the same format you captured (usually MP4), converting during editing degrades quality and takes longer.
Quality assurance and troubleshooting
Before publishing, watch the entire recording start to finish. Check:
- Audio is clear and levels are consistent
- Video is sharp and colours are accurate
- No technical glitches or drop-outs
Listen with headphones. Many audio problems (hum, background noise, clipping) are obvious on headphones but missed on speakers.
If you find problems:
- Minor audio issues: use audio editing software to remove hum or reduce background noise
- Video quality issues: check your camera settings and lighting for next time
- Sync issues (audio and video out of sync): re-encode the file or use video editing software to shift audio timing
Document what went wrong and how you fixed it for future events.
Enabling On-Demand Webcast Access and Content Reuse
Your recording is only valuable if people can watch it.
Publishing recordings across multiple platforms
Where you publish depends on your audience and goals.
Internal training:
- Store on your company intranet or learning management system
- Restrict access to employees only
- Add to training curriculum with completion tracking
Customer-facing content:
- Embed on your website or blog
- Share on YouTube or Vimeo
- Link from email campaigns or social media
Event attendee access:
- Send a link to registered attendees within 24 hours
- Include captions and chapter markers
- Allow sharing (or restrict if content is sensitive)
For professional webcast recording and archiving at scale, use a video hosting platform like Wistia, Vimeo, or YouTube. These handle encoding, streaming, analytics, and access control. You upload once, and the platform delivers to any device.
Accessibility and inclusive playback
Captions are essential. They help people with hearing loss, people in noisy environments, and non-native English speakers.
Add captions during editing, or use automated captioning (YouTube, Rev, or Descript).
Provide a transcript alongside the video. Many people prefer reading to watching.
Test your video on desktop, tablet, and phone, ensuring controls are accessible and playback is smooth.
Repurposing content for training and marketing
A 1-hour webcast can become:
- 5-10 short social media clips (30-60 seconds each)
- 3-5 blog posts (one per major topic covered)
- Email series (one email per key takeaway)
Extract speaker quotes, create graphics with key statistics, and build case studies, one webcast becomes dozens of assets.
Archive Governance, Retention, and Compliance
Professional webcast recording and archiving involves legal and regulatory considerations.
Retention schedules and compliance requirements
Retention requirements vary: financial webinars might need 7 years for audit, training records 3 years, and marketing content can usually be deleted after 2 years.
Document your retention policy:
- What type of content is recorded
- How long it’s kept
- Who decides when it’s deleted
If your webcast includes confidential or sensitive information, restrict access and set an earlier deletion date.
Security, access control, and data protection
Restrict access to authorised people only. Use password protection or role-based access control.
If you publish recordings publicly, anything published can be downloaded and shared, watermark videos to track unauthorised use.
At Webcasting Livestream, we understand that professional webcast recording and archiving is about more than just pressing record.
Frequently Asked Questions
How do you record a professional webcast?
Professional webcast recording requires three core steps: first, configure your recording software to capture both video and audio feeds from your streaming platform or encoding setup; second, run a full technical rehearsal to verify audio levels, video resolution, and screen sharing are all being captured correctly; third, initiate recording when the webcast goes live and monitor the process continuously to catch any encoding errors or quality drops. Most professional platforms record simultaneously to multiple formats and backup locations to prevent loss if a single system fails.
What equipment and software are needed to record a webcast?
Essential equipment includes a quality microphone (lavalier or studio condenser), a professional video camera or PTZ camera for speaker capture, proper lighting to avoid shadows, and a screen capture device for presentations. Software requirements include encoding software that supports multiple bitrate outputs, recording software with redundant storage paths, and a content delivery network for streaming. Your setup should also include backup power supplies and secondary internet connections to ensure uninterrupted recording even if primary systems fail.
What video format is best for archiving a webcast?
Archive your webcast in a standards-based format such as MP4 with H.264 video codec and AAC audio codec, which ensures long-term accessibility and compatibility across devices. Store the original master file in a lossless or high-bitrate format (such as ProRes or DNxHD) for future editing or repurposing. Include comprehensive metadata with each file: event name, date, speaker names, duration, and access restrictions. This approach protects your content from format obsolescence while enabling efficient reuse for training, marketing, or compliance purposes.
How should webcast recordings be archived for security and compliance?
Implement a multi-tiered archive strategy: store access-restricted recordings in a secure cloud vault with encryption at rest and in transit, maintain a secondary backup on physically isolated storage or tape for disaster recovery, and apply role-based access controls so only authorised personnel can view sensitive content. Document your retention schedule based on your industry’s compliance requirements, and conduct regular audits to verify backups are intact and recoverable. For sensitive corporate or government communications, engage a professional archival service that specialises in media governance and regulatory compliance.